> ## Documentation Index
> Fetch the complete documentation index at: https://docs.assuric.com/llms.txt
> Use this file to discover all available pages before exploring further.
# Company set up
> Record the company details, key roles, products and groups the rest of the platform draws on.
**Quick summary**
* Company setup is usually the first thing to do in your onboarding. It's where you record your company details, your people, your officers, your products and your groups.
* Company Setup details are used across Assuric; leave any identifiers you don't have yet blank.
* Company Setup isn't a one-off: come back whenever anything in your organisation changes.
## Set up your company
Company Setup holds what the rest of the platform draws on. Use the tabs at the top to move between parts.
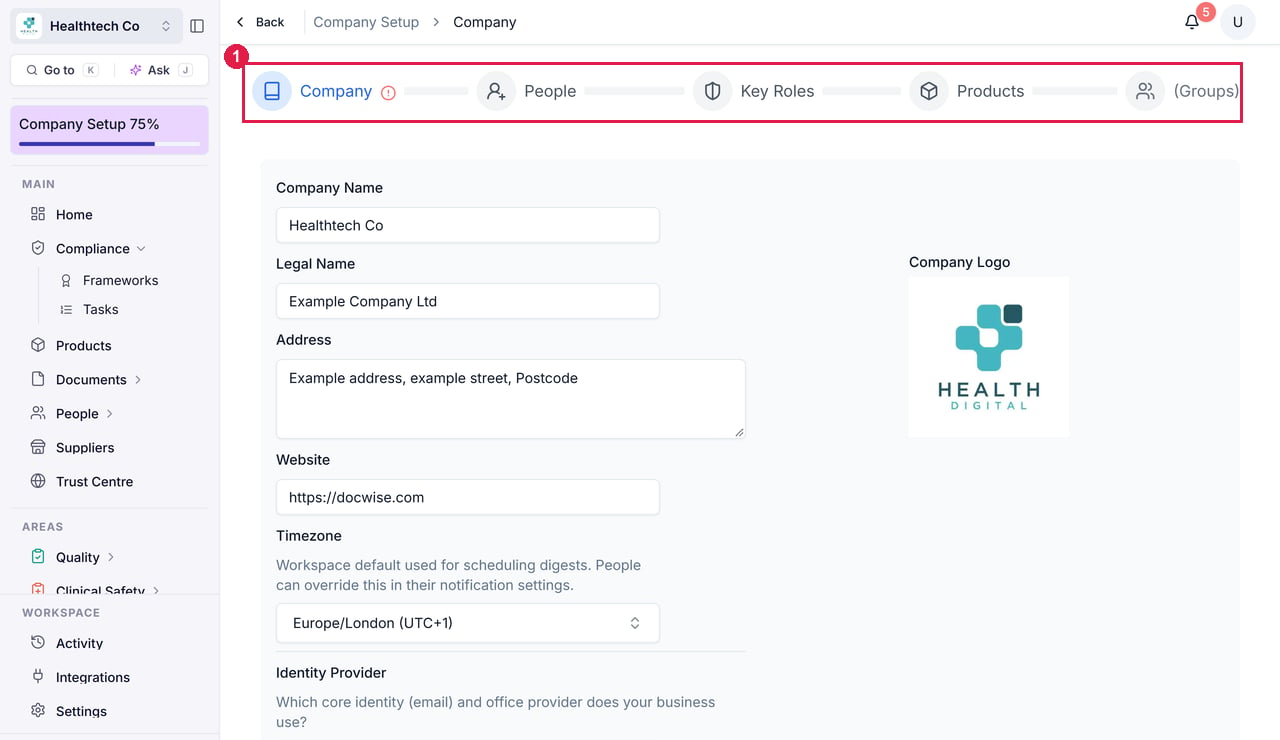 Enter your company logo, company name, legal name, website, registered address and timezone, and any identifiers you have, such as your company registration number, ICO registration reference and ODS code.
**Don't have all of these yet?** Leave them blank, and where a framework needs a code, a task explains how to get it.
Click **Add People** to invite colleagues into the workspace.
Each person gets a permission level, which controls what they can see and do, and can be assigned to groups.
On the **Key Roles** tab, name the people holding your key governance roles, including your DPO and SIRO.
**Don't have a DPO?** Assign a data protection lead instead. Many early-stage companies have no formal DPO, and that's fine: what matters is recording who's accountable.
Add each product with a description and optional owners, then map it to its frameworks, which unlocks the product-specific tasks. Click **New Product** to add another.
Groups control what each part of your team must do for compliance. Assign checklists and training to a group, and everyone in it is notified to complete them.
For example, your employees group might get a general staff checklist, and your clinical group an extra clinical safety checklist.
Default groups are set up, and you can add custom ones.
Click **Save & Back** to return to the overview, or **Next** to continue.
Remember that Company Setup isn't a one-off. You can change any information later as needed. Come back when you add a product, key role or group.
## Related articles
Get your colleagues into the workspace.
What to put in a product record.
Sign-in security, meeting schedules and your activity log, once Company Setup is done.
This documentation is built and hosted on [Mintlify](https://mintlify.com), a developer documentation platform.
Enter your company logo, company name, legal name, website, registered address and timezone, and any identifiers you have, such as your company registration number, ICO registration reference and ODS code.
**Don't have all of these yet?** Leave them blank, and where a framework needs a code, a task explains how to get it.
Click **Add People** to invite colleagues into the workspace.
Each person gets a permission level, which controls what they can see and do, and can be assigned to groups.
On the **Key Roles** tab, name the people holding your key governance roles, including your DPO and SIRO.
**Don't have a DPO?** Assign a data protection lead instead. Many early-stage companies have no formal DPO, and that's fine: what matters is recording who's accountable.
Add each product with a description and optional owners, then map it to its frameworks, which unlocks the product-specific tasks. Click **New Product** to add another.
Groups control what each part of your team must do for compliance. Assign checklists and training to a group, and everyone in it is notified to complete them.
For example, your employees group might get a general staff checklist, and your clinical group an extra clinical safety checklist.
Default groups are set up, and you can add custom ones.
Click **Save & Back** to return to the overview, or **Next** to continue.
Remember that Company Setup isn't a one-off. You can change any information later as needed. Come back when you add a product, key role or group.
## Related articles
Get your colleagues into the workspace.
What to put in a product record.
Sign-in security, meeting schedules and your activity log, once Company Setup is done.
This documentation is built and hosted on [Mintlify](https://mintlify.com), a developer documentation platform.